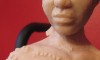
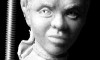
Add to Technorati Favorites

Fiddle Frame

March 25th, 2007 by goregt

If you're new here, you may want to subscribe to my RSS feed or Newsletter for additional free sculplting tips. Thanks for visiting!

Sculpting the fiddle - building the design

Ok, you are probably going to see me jump around a bit during these series. I don’t like to focus on only one area while I am sculpting, I like to move around a bit so that everything stays fresh. That being said, I have found for me that it is important to get a good base for the face before I begin to work on other parts of the sculpture. I have found that when I save sculpting the face towards the end I usually end up making mistakes that throw the rest of the sculpture off (for example the head is too big for the body). We have a pretty good start on our face, although it is not finished, so I think it is time to move on to a few more areas.

In this lesson I am going to begin sculpting the fiddle. The goal at this stage is to create a skeleton, or armature, for me to build the rest of the fiddle off of. I’ve never sculpted a fiddle before so I’ll be experimenting from step one. Since I am not familiar with fiddles, I would like to point out that I had to search for images of fiddles on the internet to get an idea of what they really look like (look at the tutorial on How can Google make you a better sculpture for details on how I research images).

Sculpting a fiddle in polymer clay My first pass at this I tried an aluminum foil armature. I started adding the clay but I just could not get the basic shape down. The whole process felt wrong to me so I decided to scrap that method and move on to a different idea.This is a good example on why you shouldn’t be afraid to experiment a little when sculpting.
Sculpting a fiddle in polymer clay In the next step I rolled out a flat sheet of clay using my pasta machine. I folded the roll of clay in half to give it a bit more thickness. From there, using one of my sculpting tools, I drew a rough outline for the body of my fiddle.
Sculpting a fiddle in polymer clay Using another one of my sculpting tools I carved/cutout the shape of my fiddle (note: I’m only working on the body of the fiddle at this stage. I will work on the neck a little later on).
Sculpting a fiddle in polymer clay Once fully cut out I will do a little clean up work and then bake the fiddle in my oven at 250 degrees for 15 minutes. I’m not concerned with fully curing the clay at this stage, my goal is to just get it hard enough so that I can start working on building out the fiddle in the later lessons.Once baked I set aside my fiddle for a least an hour so that it can cool down.

Next lesson Blocking out the torso

Previous lesson Sculpting eyes

Back to the series home page

tag:

Popularity: 10% [?]

Subscribe to the PolymerClayFan Newsletter

*
*
*

Newsletter Archive

Sculpting Again (Sent on May 10, 2008)
Favorite Sculpting Tools (Sent on August 25, 2007)
Additive vs. Subtractive sculpting (Sent on July 19, 2007)
  1    2    3    Next »

Posted in Sculpting Tutorials | No Comments »

Sculpting Eyes

March 25th, 2007 by goregt

Sculpting the eyes

There are a variety of different ways to sculpt eyes and the technique that should be used really depends on the type of eyes you are looking to create. I’ll probably paint this piece with a bronze like finish so I want a more classic feel to my eyes. For these types of pieces I like to sculpt a hole where the pupil and iris are located. The hole creates a neat illusion and is a really nice way to sculpt the eyes. Now if you wanted to paint your eyes then you will probably not want to sculpt a hole for the pupil (and or iris).

For me personally the eyes and the hands are the hardest things to sculpt. The eyes tell so much of the story in your sculpture so if they are off it can really mess up the entire piece. These steps may seem pretty simple but they can be a real challenge. I probably sculpted the eyes on this piece 4 or 5 times until I got it close to what I am looking for. Don’t get discouraged if you also struggle with the eyes, just keep practicing until you get it right.

Sculpting eyes in polymer clay Take two small balls of clay and press them into where the eye sockets are located. The eyeballs are not flat so you do not want to press them in all the way.
Sculpting eyes in polymer clay Using one of my sculpting tools (actually a dental tools) I squish or pull the edges of the eyeballs into the clay.
Sculpting eyes in polymer clay Here is what the eyes look like at this stage. Nothing ground breaking but we are making good progress. Don’t forget to keep checking the sculpture in a mirror to find any symmetry mistakes (like one eye being located higher then the other eye) Note: If you do not want to carve out the iris and the pupils you can skip the next step (for example if you want to paint the eyes on the sculpture).
Sculpting eyes in polymer clay Ok, this steps seems easy but in reality it is really easy to screw up at this stage. Using a pointed tool carve a circle into the eyes. The good news is if you screw up it is easy to fill the hole with some clay and start over again. Make sure the holes are aligned correctly before moving onto the next stage.
Sculpting eyes in polymer clay All right, time for the eyelids. Roll a couple of snakes in the clay for the upper and lower eyelids. Right now I just place them onto the face. I’ll worry about trimming the edges once everything is laid out.
Sculpting eyes in polymer clay Also repeat for the upper eyelid. Using a sculpting tool pull the edges of the eyelids into the face. The upper eyelid usually sticks out further then the lower one so I will also add another snake of clay to the upper lid (on top of the first eyelid).
And here you go, we have now redone the lips and the eyes. Getting closer to completing the face now.

Next lesson Starting the fiddle

Previous lesson Sculpting lips

Back to the series home page

tag:

Popularity: 13% [?]

Subscribe to the PolymerClayFan Newsletter

*
*
*

Newsletter Archive

Sculpting Again (Sent on May 10, 2008)
Favorite Sculpting Tools (Sent on August 25, 2007)
Additive vs. Subtractive sculpting (Sent on July 19, 2007)
  1    2    3    Next »

Posted in Sculpting Tutorials | No Comments »

Sculpting Lips

March 24th, 2007 by goregt

Sculpting the lips - time to fix some errors!

Well, I have some good news and I have some bad news. The bad news is that I checked the proportions of my sculpture in the mirror and a lot of the facial features were off. The eyes, nose, cheeks and mouth just need a lot of work. This is a good example of why you should consistently check your sculpture in the mirror when you are sculpting. I started out by checking the symmetry in the mirror but I failed to continue to do so in the later stages. If you have no idea what I am talking about then read the “Why use a mirror when sculpting” lesson first.

The good news for you is that I have to sculpt the eyes and mouth all over again. So, this is a good opportunity to show you the individual stages of sculpting the different facial features. I’ll break the sculpture features up into different lessons.

Sculpting lips in polymer clay Ok, as you can see in this picture the eyes, lips and cheeks have completely been scaled down. I spent a lot of time at this stage to make sure that the sculpture looks ok in the mirror. I will continue to check the sculpture periodically in the mirror as I progress through the lesson. Step one is to simply draw a horizontal line in the clay to identify where the mouth will be located.
Sculpting lips in polymer clay Using one of my sculpting tools I create a flat surface on the top and bottom of my line Note: The shape of the mouth is not flat under the nose and I already had a protruding lump of clay before the mouth’s line was drawn.
Sculpting lips in polymer clay This picture should give you a better idea of what I am talking about. Notice how the flat edges go out from the center of the line to the outer edges of the mouth?
Sculpting lips in polymer clay Ok, now it is time to define the area right about the upper lip. We are not done with the lips yet but I want to define the reset of the mouth before I finish off the lips. Right under the nose I create a little valley in the clay. Look at your own mouth in the mirror to get a better idea of what I am talking about (I have no idea what the medical term for this part of the body is called)
Sculpting lips in polymer clay On each side of my little valley I am going to carve out a little bit of clay.
Sculpting lips in polymer clay Now create little vertical lines in the clay to detail the lips
Sculpting lips in polymer clay And do the same for the bottom lip. Once complete, take a brush with 90% rubbing alcohol and lightly clean up the lips.

Next lesson Sculpting eyes

Previous lesson Sculpting hair

Back to the series home page

tag:

Popularity: 13% [?]

Subscribe to the PolymerClayFan Newsletter

*
*
*

Newsletter Archive

Sculpting Again (Sent on May 10, 2008)
Favorite Sculpting Tools (Sent on August 25, 2007)
Additive vs. Subtractive sculpting (Sent on July 19, 2007)
  1    2    3    Next »

Posted in Sculpting Tutorials | No Comments »

Sculpting hair

March 24th, 2007 by goregt

Sculpting the hair

The following tutorial will outline the steps that I take to sculpt hair on my sculptures. This tutorial should give you a good idea on how to start sculpting hair. Now keep in mind that different hair styles require different sculpting methods but this is a good start for a simple design. I did not completely finish off the detailing of the hair in this tutorial and I will explain why at the bottom of the page.

* The polymer clay used in this sculpture is Super Sculpey

Sculpting lines in hair The first step is to block out the hair. I usually just add clay to get the rough shape of how I want the hair to look. After I have blocked in the hair I will then carve individual lines into the clay. At this stage I want to get an idea of what the hair may look like on my sculpture.
adding hair to the sculpture In the next step I add little snakes of clay into the air. I want to make sure that the hair on my sculpture does not look flat so I add the snakes at different sections of the head.
Sculpting detail into the hair Now it is time to start blending the snakes into the head. I simply just pull the edges of the snakes into the clay.
hair sculpting Using my sculpting tool I carve squiggly lines into the clay. The key is to move the tool from side to side so that the hair looks like it is flowing along the head.
back of hair in polymer clay My sculpture started to get a little too heavy so I am using a base I made to support the weight. I simply have a base with a small wire coming out of the bottom of it. The wire is inserted into the back of the head to give the sculpture a little more support.You can also see that the hair in the back of the head is not a bunch of vertical lines. I have sculpted wavy lines in a variety of directions in the clay.
smoothing out the hair The last step is to smooth out the clay. I use a brush soaked in 91% Rubbing Alcohol to smooth out the clay. I usually do a rough job with the brush at this stage. This step can take a great amount of time so for now I’ll just get a rough idea of the overall look with the hair partially smoothed out. I will come back and finish off the hair later when I am done sculpting the face. I don’t want to invest too much time finishing off the hair at this stage because I could easily make changes when I start working on the rest of the face.

Next lesson Sculpting lips

Previous lesson Detailing the face

Back to the series home page

tag:

Popularity: 16% [?]

Subscribe to the PolymerClayFan Newsletter

*
*
*

Newsletter Archive

Sculpting Again (Sent on May 10, 2008)
Favorite Sculpting Tools (Sent on August 25, 2007)
Additive vs. Subtractive sculpting (Sent on July 19, 2007)
  1    2    3    Next »

Posted in Sculpting Tutorials | 1 Comment »

Detailing the face

March 21st, 2007 by goregt

Detailing the face

Ok, I kind of had a V-8 moment here where I got caught up in sculpting and forgot to take pictures ….. sorry :-(. This will not be the only series I do so I’ll be sure to show step by step pictures for sculpting a face in my up and coming tutorials. However, all is not lost, I’m still a long ways from finishing the face so there is still plenty more to see. I’ll back track a little here and try to explain how I did the different areas of the face.

1. Pupils - pupils are really easy to do. I just take a pointed sculpting tool and make little circles into the eyes. You want to build out the pupils before you add the eyelids to the eyes. I’m still not done with the eyes

2. Eyelids - roll very thin snakes and lay one on the top portion of the eye and the other snake on the bottom of the eye. Play with their placement until you get the look you are looking for. Using one of my sculpting tools I push or blend the edges of the eyelids into the face
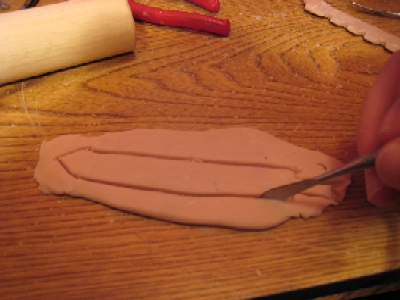
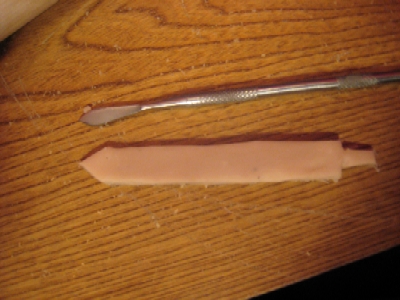
3. Lips - The individual lips are created by drawing a horizontal line into the clay. Once I separate out the top and bottom of the lips I then bulk out the lips by adding small amounts of clay. I keep bulking out the lips until I get a shape that I am looking for (if you do too much bulking just take a little away - pretty simple step but takes some time to do). Once I get a shape I am happy with I then add little faint vertical lines to the upper and lower lips (look at your lips in the mirror to see the little lines they contain).

4. Ears - At this stage I have only added small lumps of clay to represent where my ears will be placed.
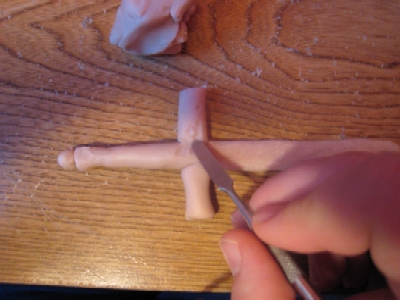
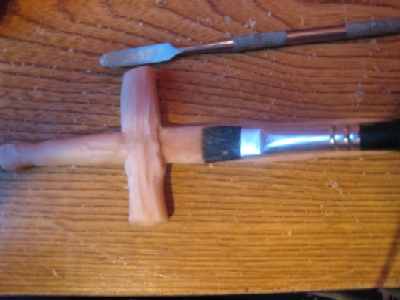
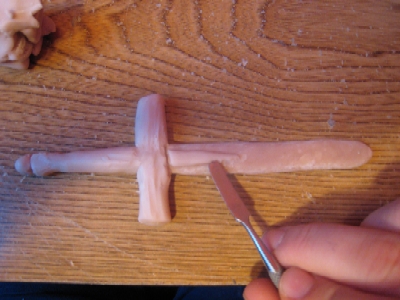
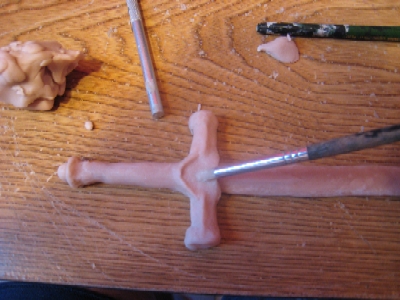
5. Horns - the horns are pretty easy. They are just large snakes or cylinders of clay that I have twisted into a shape that I like. The horns are still pretty rough at this stage so I will be building them more out in the future.

6. Spikes on the cheeks - Just little miniature horns that I added to the cheeks. I added three spikes to each cheek. I’m still playing with the design so it is hard to say if they will stay or go. I believe in experimenting with what pops in your head and this is a good example on how I make a sculpture up as I move along in the sculpting process.

7. Hair - I really only added a bulk hair for the chin and the top of the head. I’ll cover detailing the hair in a future lesson (most likely the next lesson)

Next lesson Sculpting hair

Previous lesson Blocking out the face

Back to the series home page

tag:

Popularity: 16% [?]

Subscribe to the PolymerClayFan Newsletter

*
*
*

Newsletter Archive

Sculpting Again (Sent on May 10, 2008)
Favorite Sculpting Tools (Sent on August 25, 2007)
Additive vs. Subtractive sculpting (Sent on July 19, 2007)
  1    2    3    Next »

Posted in Sculpting Tutorials | 2 Comments »

Rolling snakes

March 21st, 2007 by goregt

Rolling snakes in the clay

In a few of the other tutorials on this site I have referenced rolling snakes or cylinders of clay. These thin round pieces of clay are useful for sculpting a variety of things like veins, hair, small horns and different features of the face. I’ve included a picture tutorial below to better explain what I am talking about.

lump of clay Step One - Grab a clump or lump (or however you want to call it :-) ) of clay.
roll a snake out of clay Step Two - roll the clay until if forms a snake or cylinder type of shape. In the picture I am rolling the clay against my table but most of the time I usually just roll it between my two hands. My other hand was busy at the moment taking pictures so the table was used as a substitute. Doesn’t matter which way you do it as long as you get the results you are looking for.
example of snakes in clay The final picture shows different “snakes” or cylinders of clay that I made. You are going to very the size of the snake depending on what you plan to use it for. For instance veins will require very thin snakes while horns may require a thicker snake for sculpting.
tag:

Popularity: 18% [?]

Subscribe to the PolymerClayFan Newsletter

*
*
*

Newsletter Archive

Sculpting Again (Sent on May 10, 2008)
Favorite Sculpting Tools (Sent on August 25, 2007)
Additive vs. Subtractive sculpting (Sent on July 19, 2007)
  1    2    3    Next »

Posted in Sculpting Tutorials | No Comments »

Fiddler blocking the face

March 20th, 2007 by goregt

The Fiddler Stage One - Blocking out the Face

A couple of key points before we begin. The polymer clay that I use is called Super Sculpey but you can use just about any polymer clay to do these lessons (however regular Sculpey would probably present itself as a challenge). I’m a huge fan of Super Sculpey and it is predominantly the main clay that I use. Super Sculpey is just one of those clays that I feel comfortable with.

Second of all don’t judge a book by its cover. This sculpture will probably look like a third grader made it for awhile. As the lessons progress you should be able to see the sculpture advance. Everyone’s skill level is at different stages so put forth your best effort when you start sculpting and with time you should be able to knock out some really impressive art.

Step One is probably the easiest step. All you need to do is take a piece of armature wire and bend a loop at the end. Since I am only working on the face at this stage I will expand enough wire to give me working room. The face on this sculpture is going to be around 3 to 4 inches long so I should have enough wire there to get me started. If I need more wire, all I have to do is unwrap it from the end.
Aluminum foil on the armature Step Two - bulking out the wire. In this step I want to bulk out the wire with aluminum foil to conserve clay. I keep wrapping the top of my armature with aluminum foil until I get the desired thickness. Keep in mind the size of the head that you plan to sculpt when you bulk out the armature with aluminum foil. You still need to be able to add enough clay to sculpt with. The worst thing that can happen at this stage is that you add too much aluminum foil and run into problems when you start sculpting (i.e try to carve into the clay and run into a wall of alumimun foil). Less (aluminum foil) is always more at this stage.
Adding clay to the armature Step Three - adding the clay. Ok, now it is time to throw some clay on this thing. I keep wrapping thin layers of clay until the aluminum foil is completely covered. The goal is to start defining the overall shape of the head.
blocking out the face Step Four - defining the eyes, nose and mouth. All I basically do here is roll out cylinders of clay and press them in the locations for the eyes, nose and mouth. The top horizontal bar will represent where my eyebrows will go (the eyes will be built out below this section), the nose is a small vertical cylinder of clay and the mouth (where the lips will go) is a small horizontal cylinder of clay.Nothing scientific here and it doesn’t have to be perfect, all I want to do is to start blocking out the different areas of the face. Once the individual parts are added for the eyes, nose and mouth I simply take one of my sculpting tools and pull the sides of the cylinders into the base of the clay (your fingers can also be used at this stage)
Defining the face Step Five - defining the face. From here it is just additive sculpting, I simply add little pieces of clay to define all the shapes such as the nose, cheeks and forhead. Again I am still just blocking out the shapes of the face but it is important at this stage to get a mirror and check to make sure you symmetry is correct on the face. You will need the mirror throughout the sculpting process so go ahead and start getting use to using one at this stage.* If you have no idea what I am talking about then visit my sculpting with a mirror tutorial for additional details.
Blocking out the eyes Step Six - bulking out the eyes. This step doesn’t look like we made much progress but actually it has taken a lot of work to get to this stage. I’m still defining the shapes of the cheeks and nose and this will continue until I am done with the face. I’ve added little balls of clay for the eyes and have pressed them into where the sockets use to be. It may not look like much yet but the face is really starting to come together. Once I’ve blocked everything out I can then spend time on pulling out all of the facial features.It is hard to explain without a video but you just want to keep adding little bits of clay to different areas until you get the shape you are looking for. Make sure you look at pictures of faces, in the shape or position that you are sculpting, to get an understanding on how the mouth, nose and eyes all fit together.

Next lesson Detailing the face

Back to the previous page

Gerald

tag:

Popularity: 19% [?]

Subscribe to the PolymerClayFan Newsletter

*
*
*

Newsletter Archive

Sculpting Again (Sent on May 10, 2008)
Favorite Sculpting Tools (Sent on August 25, 2007)
Additive vs. Subtractive sculpting (Sent on July 19, 2007)
  1    2    3    Next »

Posted in Sculpting Tutorials | 1 Comment »

Sculpting Skin

March 18th, 2007 by goregt

Creating Skin With Polymer Clay

Adding the right details to a sculpture can take an average work of art and turn it into a masterpiece. I have seen a lot work-in-progress sculptures that I thought were OK at best turn into amazing looking works of art once the details were added. Now I am not advocating that one should only focus on details versus the fundamentals in sculpting, it is still important that you understand the anatomy and symmetry of your subject that you are sculpting. A detailed well crafted sculpture will still present itself better then a well detailed poorly sculpted work of art any day.

Creating the illusion of skin is probably my most favorite type of detailing. Although this technique takes a lot of practice to master, when done right it really adds a whole new level to sculpting. Whether you are sculpting a human, lizard or an alien, adding skin textures can really bring your artwork to life.

I recently created a sculpture of an alien bounty hunter which we will use as an example in this article. Although this sculpture is of a fantasy creature, we can still use the same principles and techniques for creating skin on any sculpture, no matter what your subject matter is. The first step is to get all our tools in order.*click on the image to see a larger view


Tool/ Materials Needed

  1. Homemade detailing tool (will cover this in a second)

  2. Paint brush

  3. 91% Rubbing Alcohol

  4. Polymer Clay (using Super Sculpey mixed with Fimo in this example)

The homemade tool that I use is inexpensive and probably the easiest tool you will ever make. My tool is simply made up of floral wire and you can pick it up at your local craft store or Wal-Mart. If you are having a hard time finding it just ask someone that works at the store for some assistance. When you purchase floral wire it usually comes in a package with several long wires. Take out one of the wires and cut it to where it is 3 to 4 inches in length. Fold the wire in half to form a horseshoe and then you are done.

The key to creating the skin detail is to map out the directions in which your lines will flow. In our example, lets assume that I am creating a skin detail on the chest of my creature. Create horizontal lines in the clay by dragging your tool from left to right (or which ever direction you are most comfortable with). Now make sure that the lines are not straight, you will want to weave them in and out in your pattern. Repeat this step several times crossing lines over each other. Once that is complete then go back and add crosshatching vertical lines. Smooth out the clay with rubbing alcohol.

To help you get a visual idea what I am talking about, I will take a lump of polymer clay (Super Sculpey mixed with Fimo) and carve my skin details into it. Click on the images to see a larger view of the picture.

Handmade carving tool next to a lump of polymer clay.
Drawing horizontal lines in my clay. Make sure that the lines very in depth and cross over each other. After the horizontal lines are drawn, create a cross hatch of vertical lines across the top of them
Smooth out the clay with 91% rubbing alcohol.
Finished results (note: you may want to go over the horizontal lines again if you did not get them deep enough the first time)
An example of what this technique looked like when I was working on the bounty hunter.

Tip: Cover the area with Saran Wrap prior to scratching out the lines in clay. This will help keep your clay from tearing when you draw your lines (tip not used in the examples above).

That’s it, now go out an practice. This technique does take a little time to master but it is a great way to create an amazing effect on your artwork.

tag:

Popularity: 27% [?]

Subscribe to the PolymerClayFan Newsletter

*
*
*

Newsletter Archive

Sculpting Again (Sent on May 10, 2008)
Favorite Sculpting Tools (Sent on August 25, 2007)
Additive vs. Subtractive sculpting (Sent on July 19, 2007)
  1    2    3    Next »

Posted in Sculpting Tutorials | No Comments »

Mirror

March 18th, 2007 by goregt

Why use a mirror when sculpting?

One of the key sculpting tips that I have found beneficial for improving the way my sculptures look is using a mirror to check the symmetry of the sculpture. Symmetry by definition, source www.dictionary.com, is the “the proper or due proportion of the parts of a body or whole to one another with regard to size and form; excellence of proportion”. So in essence the right hand should mirror the left, the left side of the face should mirror the right and so on and so on.

Usually when you create a sculpture, especially of the human form, it can be difficult to realize flaws in the symmetry. Sometimes things may appear to be a little off but it isn’t always obvious to the naked eye. There may be times when you overlook that the left eye is at a different angle then the right or tad lower then the right. There are several different tools and tips to help an artist improve symmetry but the one that I use the most, and will discuss in this article, is using a mirror to check to symmetrical flaws.

There are times where I will spend hours upon hours trying to perfect a sculpture only to hold my sculpture up to a mirror and have my heart drop into my stomach. You see the mirror does not hide the flaws and at times can point out your sculpting mistakes with brutal honesty. To better prove my point I am going to use an example of a warrior angel sculpture that I have been working on. In our example I am going to show you a picture of the angels face before and after I used a mirror. The goal is to find the symmetrical errors in the mirror correct them and see how changes improve the results on the final sculpture.


Examples of sculpting with a mirror


* Click on the thumbnails to see a larger view of the picture
** This sculpture is created with Super Sculpey

1. When I look at my angels face in the mirror I noticed that the face seems out of balance on the far left of the picture (right side of the angel’s face). The mirror points out the the angel’s right cheek is too big and the right eye droops a little bit
2. After spending some time rebuilding the right side of the face and checking the proportions constantly in the mirror I finally got to a stage where the face is close to being symmetrical.At this stage I really just make small changes, check the mirror and then go back to making more small changes. I keep this back and forth process up until I balance out the face.
3. Here is a picture of the angel’s face without the mirror.

I would like to make a final statement about improving your artwork with a mirror because from personal experience the mirror at times can create a very frustrating experience. I have personally had times where I just could not get the symmetry down 100% in the mirror. No matter what adjustments I made to the artwork, it just didn’t look perfect in the mirror.

The key is to keep improving with each piece so don’t quit or beat yourself if you cannot get the symmetry down right on your current piece. With each piece I make, I learn more and more about sculpting and how to hone in on my own skills. I’m a self-taught sculptor that sees each and every one of my sculptures as lesson in the overall journey of me becoming a better artist. There are sculptures that I made a couple of years ago that I look at now and just shake my head at. The entire flaws jump out at me now but that is because over the past couple of years I have worked at improving my skills with each and every piece I create. I also imagine that a couple years from now I will look at some of my current pieces and see flaws in them that I am missing today. That is expected and part of the learning process.

I believe that you should always do the best that you can for where your skills are today. In time with enough determination and practice I truly believe that everyone can create a masterpiece.

If you are interested in a step-by-step progress of this particular sculpture then you can view more about it on my blog at www.warrior-angels.com.

tag:

Popularity: 18% [?]

Subscribe to the PolymerClayFan Newsletter

*
*
*

Newsletter Archive

Sculpting Again (Sent on May 10, 2008)
Favorite Sculpting Tools (Sent on August 25, 2007)
Additive vs. Subtractive sculpting (Sent on July 19, 2007)
  1    2    3    Next »

Posted in Sculpting Tutorials | 1 Comment »

Sword

March 18th, 2007 by goregt

How to make a sword with Polymer Clay

Making swords and other weaponry can be an easy process and there are tons of different methods and materials that can be used for their creation. This tutorial focuses on one option that can be used to make a sword out of clay but it is by far not the only option that you have available to you. I personally find this method the easiest for me. The information below is designed to give you step-by-step instructions on how to easily make a sword out of polymer clay.

Tools Needed

  • Polymer Clay (Super Sculpey in my example)
  • Dremel
  • 91% Rubbing Alcohol
  • Aluminum foil


Making a sword tutorial


** This sculpture is created with Super Sculpey

The first step is to roll out your clay to the length that you want yours sword’s blade. Note: You will want to leave some thickness to the clay. Do no roll it out till it is paper thin.
Cutout the outline of your sword using a knife of some other type of tool
I cut a little notch at the end of my sword so that I have something to insert into the handleI then bake my sword’s blade in the oven for 15 minutes at 250 degrees. Let the clay cool for 30 minutes to an hour before moving onto the next step
Using a Dremel I sanded down the edges of my sword and rounded it off to get a basic look. The next step is to roll out individual pieces of clay that I will use to make the sword’s handle (in this example a cylinder, ball and small snake-like cylinder).
I attach all the individual pieces and rollout two more cylinders for the top of the handle
Blend the pieces together
I put a thin layer of Vaseline on the blade of the sword since it has already been baked. This will help the new clay stick to the baked clay.
I play with a few designs until I find something that I like and bulk up the blade of the sword.
After I get the basic design of my sword down I then use rubbing alcohol and a paint brush to smooth out the clay (a Q-tip could have also been used at this stage)
I want to add texture to my sword’s handle so I use wadded up aluminum foil to add to my design (similar example as in the rocky seascape tutorial)
And there is my finished sword ready to be baked again. Remember that the design needs to be added to both sides of the sword.

The entire process of making a sword with polymer clay is relatively easy and I used a very simple design for this example. The key is to take the steps I’ve shown above and expand on them. With a little practice, time and effort a really impressive sword could be created using the techniques above.

tag:

Popularity: 19% [?]

Subscribe to the PolymerClayFan Newsletter

*
*
*

Newsletter Archive

Sculpting Again (Sent on May 10, 2008)
Favorite Sculpting Tools (Sent on August 25, 2007)
Additive vs. Subtractive sculpting (Sent on July 19, 2007)
  1    2    3    Next »

Posted in Sculpting Tutorials | 3 Comments »

« Previous Entries