Polymer Clay Fan

Free Sculpting Tutorials

Search Results

Angel & Demons Cigar Ashtray Tutorial

Posted by goregt On January - 31 - 2012

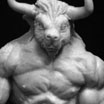
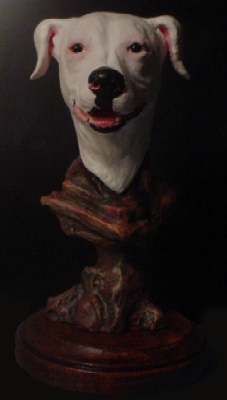
My goal for this tutorial is to show step-by-step how the GoreArtistry cigar ashtrays are created from concept to the final product. The tutorial will be covering the following topics.

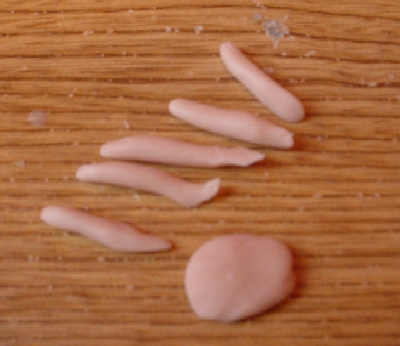
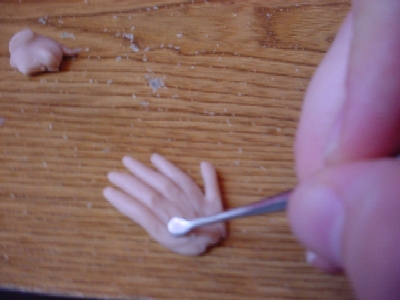
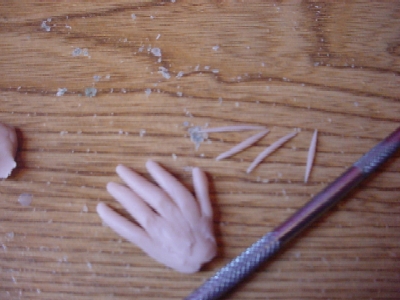
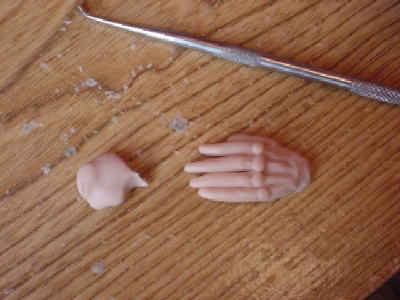
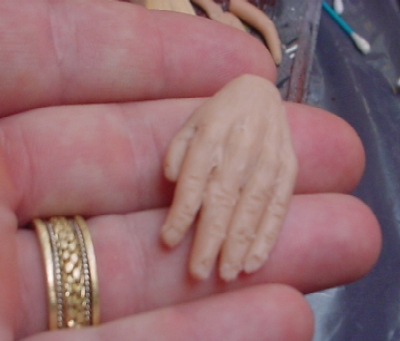
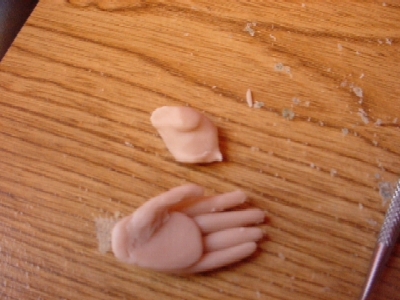
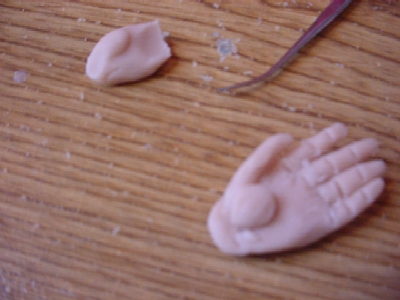
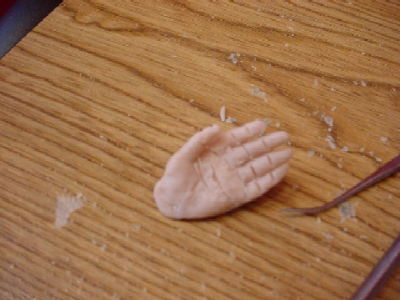
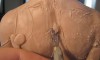
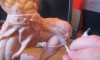
  1. Basic picture tutorial for the sculpting of the ashtray
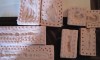
  2. Creating the mold
  3. Pouring a cold-cast bronze
  4. Sanding and polishing the cold-cast bronze
  5. Final product

The first step in any project is coming up with a design. Great sculpting on top of a poor design will in most cases result in a mediocre product.  However, I’ve seen projects that have great designs with average sculpting skills create something that really is interesting to look at.  My goal is to hopefully strive for the best of both worlds with a product that results from above average sculpting skills and a great design (we shall see if I’m able to pull it off). Read the rest of this entry »

Sculpting Tentacles Tutorial

Posted by goregt On August - 24 - 2009

I’ll have to admit that I have a thing for the sea lately and a lot of my more recent artwork uses the sea as a common theme. So far I’ve sculpted a female warrior on a giant seahorse and I’m currently working on another personal project that is half woman and half octopus (kinda cool 😉 ). I have quite a few other ideas floating around in my head but as always time seems to be against me. Read the rest of this entry »

Seascape Tutorial

Posted by goregt On March - 18 - 2007

How to sculpt a unique rocky seascape base

In the following tutorial I am going to show you how you can quickly and easily sculpt a cool looking rocky base for your sculptures. The entire process for the base took me around 30 minutes to an hour to complete. As of this writing I just finished a sculpture of a sea dragon. I wanted to add a unique base to my dragon sculpture but I didn’t want anything that I felt was taking away from the sculpture.

** The pictures below will show you step-by-step how I created a base that I think compliments the sculpture. Note that the pictures are thumbnails so click on the individual images for a larger view.

Read the rest of this entry »

Hand Tutorial

Posted by goregt On March - 18 - 2007

How To Sculpt Hand With Polymer Clay

Two of the hardest things that I have found to sculpt are the hands and eyes. I don’t know why, they are just shapes like anything else, but for some reason they always present themselves as a challenge for me. I have a little technique that I am about to share with you that I use for most of the hands I sculpt. However, keep in mind that this is not the only method you can use to sculpt hands.

The technique that I use does not require an armature which has its advantages and disadvantages. I’ve have used and armature in the past but the problem I found is when I decided later on in the sculpting to move the fingers. The fingers can still be moved when using an armature but the detail work can sometimes get damaged in the process. The disadvantage of sculpting hands without an armature is that you do not get the additional support that an armature provides. If the hand you are sculpting is just hanging by the side it really is not an issue, however if your character is holding something like a sword it can then be a problem.

Now the hand in this tutorial is going to be more of a sketch to give you the general idea on how to sculpt a hand. This tutorial should give you a good foundation to start building your hands off of.

Hand sculpting tutorial


*I need to upgrade my digital camera and apologize in advance for the quality of the pictures

1. Roll out a ball of clay and slightly flatten it to the size that you want your palm.2. Roll out five little tubes of clay to represent the fingers
3. Strategically place the fingers onto the top of the squished ball of clay (look at your own hand as a reference)4. Using your sculpting tool, one of my dental tools in this example, pull the fingers into the base of the hand
5. Roll out four more little tubes (snakes) to add as the bones in the hands
6. Roll out little balls of clay for the knuckles
7. Add little horizontal indentions or lines for the knuckles (using another one of my dental tools here)8. Sculpt the finger tips
9. Turn over the hand and blend the fingers into the palms of the hand (try to avoid squishing the fingers)
10. Add a little more clay to the palm to thicken it up a bit.
sculpting a hand with clay 11. Add lines to the fingers to match the location on knuckles (on the other side of the hand). I have cut my lines a little deeper then needed since I will bend my fingers.

Sculpting Tutorials

Posted by goregt On March - 15 - 2007
Sculpting Tips and Tutorials
free polymer clay tutorials Sculpting Series
Â
polymer clay sculpting tips and tricks Sculpting Tips and Tricks

Polymer Clay Sculpting Tutorials

Wax Sculpting Tutorials

General Sculpting Tutorials (not specific to one medium)

Mold Making Tutorials

  • Making a Mold – Step One (New) – Introduction into the mold making process.
  • Mold Box

  • – Step Two (
    New)
    – How to make a mold box for a two piece mold.

Making a Mold for the Lost Skulls Cigar Ashtray

Posted by goregt On November - 15 - 2018

The tutorial in this video is for all of those interested in the process of creating a single part mold. I go into detail on creating the mold box and pouring the silicone mold.

Sculpting Scales

Posted by goregt On September - 17 - 2012

There are a lot of different ways you can sculpt scales and the tutorial below is just one of many examples that you can use. I’m using a wax in this tutorial but the same steps can be used with polymer clay.

  1. The first step is to design and sculpt the forms of your sculpture (i.e. muscles bulging, wrinkles in skin, etc)
  2. Next, using a sharp tool I will draw patterns into my wax.
  3. Periodically I’ll brush away the excess wax to clean my surface while I work.
  4. Once I have my pattern to my liking I’ll go back and carve a deeper cutout around my shapes.
  5. After the excess wax has been removed I’ll begin to smooth out and clean up the sculpture with Odorless Mineral Spirits (use rubbing alcohol if you are sculpting with polymer clay). Read the rest of this entry »

Cigar Ashtray Sculpting Trick

Posted by goregt On August - 11 - 2011

Skull cigar ashtray

For the most part I live a very healthy lifestyle, I’m in the gym six to seven days a week, eat very clean (except for Saturdays) and rarely drink.  I’m not oblivious to the fact that most people will probably find me to be a pretty boring person but hey I am what I am.  However, that being said one of the vices in my life is that I like to smoke cigars.  I don’t get to smoke them often, at best only a couple times a week, but they are something I’ve come to really enjoy over the years.

I enjoy collecting different cigar accessories, for example lighters and cutters, however one of the key accessories that was missing from my collection was a cigar ashtray.  There are quite a few cigar ashtrays out there that have a good design but I have yet to find one that really grabs my attention.  One of the key advantages of being an artist is that if I’m unable to find what I’m looking for in the commercial market I can always create it myself.  I wanted an ashtray consisting of skulls and skulls so it was off to the workshop to begin my project. Read the rest of this entry »

Tribal Back – 3

Posted by goregt On October - 5 - 2009

Step three in this tutorial builds on the first two steps that we used to sculpt the back. I continue to build out the individual forms by adding and removing clay to mimic the shapes in my resource material.

For this sculpture I am sculpting the details on the left side of the back first and then will move to the right side. I’m only doing it this way because it is a little easier to create a tutorial using this method. If I was just sculpting this without trying to document the process I would sculpt both side of the back at the same time. Read the rest of this entry »

Tribal Back – 2

Posted by goregt On October - 1 - 2009

In the last tutorial I briefly went over how I like to draw out a rough outline of the different muscles. I use this trick on quite a few places on the body and it really helps be understand and build out the individual shapes. For example, I like to draw out the individual muscles when I sculpt muscular arms and very lean abs. The back also has a lot going on so even though my outline is pretty rough it still helps me break down the back into the individual muscles (or shapes).

The first step is to separate my back into two halves. Now you can’t just simply carve a line down the center of the back, otherwise your sculpture will look like it has a canon going down the center of it. To make the back look more natural I will blend the two halves of the large back muscles (latissimus dorsi) into the area of where the spine is located. This task is easily accomplished by carving the center edges of the back until it gently slopes to the spine. I keep working both halves of the back until I get a look that I am happy with. Read the rest of this entry »

VIDEO

Enter the video embed code here. Remember to change the size to 320 x 270 in the embed code.

TAG CLOUD

Recommended Sites

About Me

Nothing special, just a self-taught sculptor having fun with my art and showing all of you the tips and tricks I use to create my own artwork

Twitter

    Photos

    Activate the Flickrss plugin to see the image thumbnails!