Polymer Clay Fan

Free Sculpting Tutorials

Attaching Hand To Fiddle

Posted by goregt On June - 14 - 2007

Attaching the Hand to the Fiddle

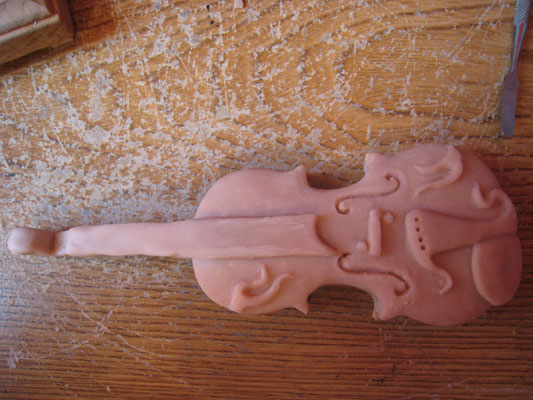
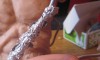
Hands are tricky so I like to sculpt them individually when possible and add them to the sculpture as a separate piece. In this tutorial I am going to take the hand from the previous lesson and attach it to my already baked fiddle.

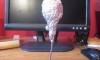
I’m approaching this sculpture as if it was a puzzle adding each section together one piece at a time. What is nice about this step is that I am that much closer to adding the fiddle to my Fiddler. The fiddle really brings out the feel of the piece and I am really looking forward to seeing it all put together.

Read the rest of this entry »

Detailing Fiddle Scroll

Posted by goregt On June - 4 - 2007

Detailing the Scroll

In our previous tutorial we started to build out the scroll on the fiddle. The base design for the scroll has been built and now it is is time to detail our fiddle’s scroll. I’m not going to fully complete the scroll by adding the keys yet but I do want to get the scroll where it is 95% complete. After this lesson, the fiddle really should look almost complete minus a few minor add-ons that will come later (keys, strings, etc).

What I like about the tutorials for the fiddle is they give a great example of how you can build a sculpture in stages. Instead of focusing on the entire piece you break it down into little individual projects. It is a lot easier to sculpt when you approach a project this way. The key is to focus on one small area at a time by trying to figure out how to create that one piece. Once figured out you then build it and then move on to the next little project. Repeat these steps several times and before you know it you have a completed piece.

Read the rest of this entry »

Attaching the scroll to the fiddle

Posted by goregt On May - 28 - 2007

Attaching the scroll to the neck of the fiddle

polymer clay fiddleIn the previous tutorial I did a rough sculpt of the scroll (top piece) for the fiddle.  The next step is to add the scroll to the neck of the fiddle.  Once attached I will then begin to work on the details.  The process for adding the scroll to the neck of the fiddle is the same process that was used to add the neck to the body.  The first step is to lightly coat the baked pieces of clay with Vaseline, then take a tissue and wipe the excess off.  Next just add a new thin layer of clay and the scroll should easily attach from there.

Read the rest of this entry »

Sculpting the Scroll

Posted by goregt On May - 23 - 2007

Sculpting the scroll

Ok, soooo we have added the base (belly), a rough neck and now it is time to add the scroll (top part of the neck). The following steps are quick and easy and a good start to building a basic scroll. I still have a lot more to do to the scroll, like cleaning it up and adding the keys. However, as I have done in all the other tutorials, I always first cover the foundation or basic steps. Once you get a good foundation then adding the details is a cinch.

The polymer clay I am using for this particular piece is Super Sculpey.

Read the rest of this entry »

Attaching Fiddle Neck

Posted by goregt On May - 20 - 2007

Attaching the neck to the fiddle

Ok, now that we have a pre-baked neck for our fiddle it is time to attach it the body. For this particular sculpture there has been a lot of sculpting then baking and then sculpting again. I’ve already baked various components of the fiddle multiple times through this series and will be baking a few more times before everything is completed. Not all of my sculptures work this way, in actuality most don’t, but for this piece is just seems to be the best approach. Once a piece is baked it is hard and easier to work with. The key is to be able to add more clay to the baked piece so that you can add the details. You will wee exactly what I mean in the next couple of lessons.

The polymer clay I am using for this particular piece is Super Sculpey.

Read the rest of this entry »

Fiddle Neck

Posted by goregt On May - 20 - 2007

Cutting out the neck of the fiddle

If I had to do this all over again I would have handled the neck on the fiddle a little differently. Instead of attaching the neck at the top of the body, I would have attached it more towards the center of the fiddle’s body (part of the neck would have laid on top of the body to give it more support). It is too late to turn back now and I can still work with what I have in front of me. As I have already stated in this sculpting series, you do learn from your mistakes.

The fiddle for this particular project is coming close to completion now. I’m really looking forward to completing the fiddle because it will really change the feel of the sculpture once it is attached to the Fiddler, our subject matter for this series. I still have to build out the arms and work on the details on various other body parts but at this stage in the game I’m comfortable to say that we are past the halfway mark in the sculpting process.

Read the rest of this entry »

Fiddle Components

Posted by goregt On April - 22 - 2007

Building out the individual components of the fiddle

Now it is time to start building out the different components of the fiddle. I plan to give my fiddle a little flavor so do not expect it to look like a traditional fiddle. Instead, my goal is to tweak the design a bit using my own unique style. There is nothing wrong with a traditional looking fiddle and I’m not going to radically change anything but I wanted to create something that just didn’t look like something you see in our environment.

Read the rest of this entry »

Bulking the Fiddle

Posted by goregt On April - 21 - 2007

Filling out the base of the fiddle

So the goal of this lesson is to complete the frame for the body of my fiddle. I’m not going to be working on any of the details yet since I want to first build out a good base. Once my base is complete, I will again bake the sculpture and then start working on the details in the future lessons.

It is going to take several lessons to finish the fiddle so I’ll try to break them up to where they make sense.

Hopefully the third try is the charm for this lesson. Again, the polymer clay I am using for this particular piece is Super Sculpey.

Read the rest of this entry »

New fiddle

Posted by goregt On April - 21 - 2007

Sculpting a new fiddle

Well, it is that time again where we need to get back to sculpting the fiddle. I started working on the fiddle and it was coming along ok but I just felt that I was going to have to put a lot of time into it to get it the way I want it to look.

I’m very comfortable sculpting things from life, like the human body and animals, but inanimate objects always present themselves as a challenge. The key to sculpting things like a fiddle is to make sure that the shape is symmetrical on all sides. Instead of spending a lot of time trying to get just the basic shape down, I decided to take the pumpkin carving template approach to my design.

The first step was to search the internet for a picture of a fiddle that I could use as my template. Once I located a picture I saved it to my computer and resized the image to the size that i need for my sculpture

Read the rest of this entry »

VIDEO

Enter the video embed code here. Remember to change the size to 320 x 270 in the embed code.

TAG CLOUD

Recommended Sites

About Me

Nothing special, just a self-taught sculptor having fun with my art and showing all of you the tips and tricks I use to create my own artwork

Twitter

    Photos

    Activate the Flickrss plugin to see the image thumbnails!