Sculpting a new fiddle
Well, it is that time again where we need to get back to sculpting the fiddle. I started working on the fiddle and it was coming along ok but I just felt that I was going to have to put a lot of time into it to get it the way I want it to look.
I’m very comfortable sculpting things from life, like the human body and animals, but inanimate objects always present themselves as a challenge. The key to sculpting things like a fiddle is to make sure that the shape is symmetrical on all sides. Instead of spending a lot of time trying to get just the basic shape down, I decided to take the pumpkin carving template approach to my design.
The first step was to search the internet for a picture of a fiddle that I could use as my template. Once I located a picture I saved it to my computer and resized the image to the size that i need for my sculpture
Hopefully the third try is the charm for this lesson. Again, the polymer clay I am using for this particular piece is Super Sculpey.
 |
The first step is to roll out a sheet of clay with my pasta machine. The picture shows the template I found on the web, my last pass at a fiddle (very rough at this stage but was starting to take shape) and my sheet of polymer clay. |
 |
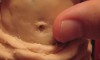
The next step is a lot like carving pumpkins from templates. Lay the template on the sheet of polymer clay and with a sharp tool punch holes to outline the design of the fiddle.Little shameless plug of my pumpkin carving template site from the link above 🙂 |
 |
The picture is a little blurry but basically this is what the design of the fiddle looks like once we punch holes from the template into the clay. Keep in mind that I am only focusing on the body of the fiddle at this stage. |
 |
The lesson learned from my last attempt at a fiddle is that you need to halves to create the body correctly. Basically you will have a bottom and top and some type of spacer in between the two pieces (to get the thickness of the fiddle down right). This will make a little more sense in a future lesson. So I repeat the previous steps and create a second fiddle. |
 |
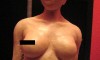
Here are the pics of my two fiddles punched out in the clay |
 |
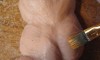
Using a sharp tool I cut out my fiddles. |
 |
The dotted lines have been cut and now it is time to remove the excess clay. |
 |
My two fiddle halves are now ready to go in the oven at 275 degrees for 15 minutes. I’ll let them cool for at least and hour or two before I move onto the next step. I want to bake the fiddles at this stage so that is can easily work on the future steps. |
Next lesson – Bulking the Fiddle
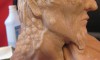
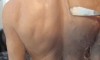
Previous lesson Torso skin details