How To Sculpt Hand With Polymer Clay
Two of the hardest things that I have found to sculpt are the hands and eyes. I don’t know why, they are just shapes like anything else, but for some reason they always present themselves as a challenge for me. I have a little technique that I am about to share with you that I use for most of the hands I sculpt. However, keep in mind that this is not the only method you can use to sculpt hands.
The technique that I use does not require an armature which has its advantages and disadvantages. I’ve have used and armature in the past but the problem I found is when I decided later on in the sculpting to move the fingers. The fingers can still be moved when using an armature but the detail work can sometimes get damaged in the process. The disadvantage of sculpting hands without an armature is that you do not get the additional support that an armature provides. If the hand you are sculpting is just hanging by the side it really is not an issue, however if your character is holding something like a sword it can then be a problem.
Now the hand in this tutorial is going to be more of a sketch to give you the general idea on how to sculpt a hand. This tutorial should give you a good foundation to start building your hands off of.
Hand sculpting tutorial
*I need to upgrade my digital camera and apologize in advance for the quality of the pictures
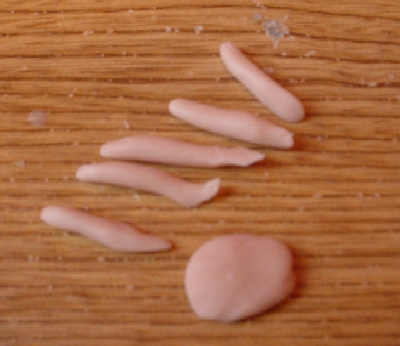 |
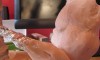
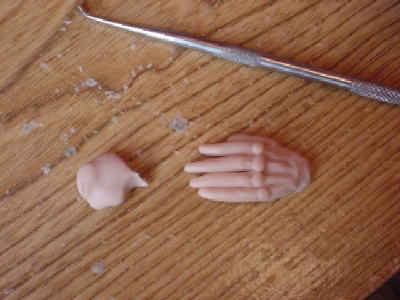
1. Roll out a ball of clay and slightly flatten it to the size that you want your palm.2. Roll out five little tubes of clay to represent the fingers |
|
|
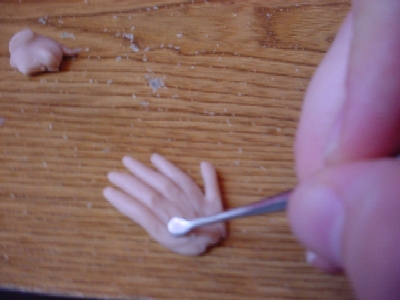 |
3. Strategically place the fingers onto the top of the squished ball of clay (look at your own hand as a reference)4. Using your sculpting tool, one of my dental tools in this example, pull the fingers into the base of the hand |
|
|
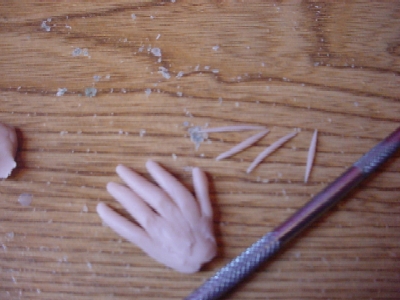 |
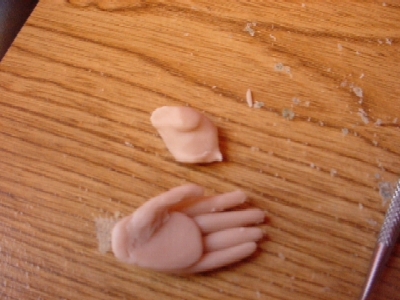
5. Roll out four more little tubes (snakes) to add as the bones in the hands |
|
|
 |
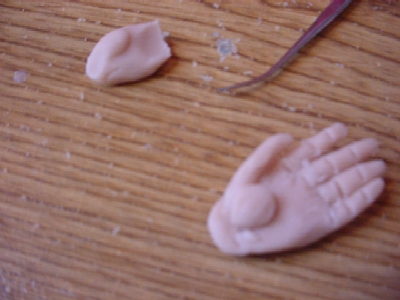
6. Roll out little balls of clay for the knuckles |
|
|
 |
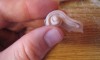
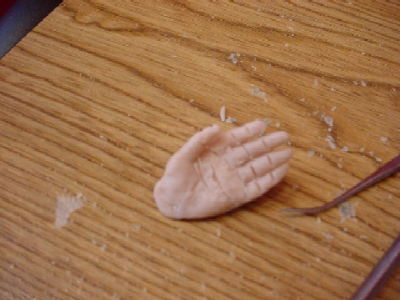
7. Add little horizontal indentions or lines for the knuckles (using another one of my dental tools here)8. Sculpt the finger tips |
|
|
 |
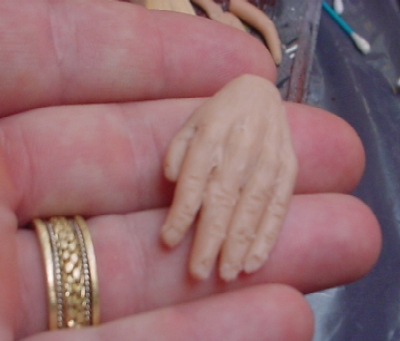
9. Turn over the hand and blend the fingers into the palms of the hand (try to avoid squishing the fingers) |
|
|
 |
10. Add a little more clay to the palm to thicken it up a bit. |
|
|
 |
11. Add lines to the fingers to match the location on knuckles (on the other side of the hand). I have cut my lines a little deeper then needed since I will bend my fingers. |