Polymer Clay Fan

Free Sculpting Tutorials

Archive for April, 2007

Fiddle Components

Posted by goregt On April - 22 - 2007

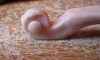
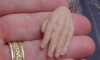
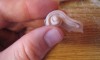
Building out the individual components of the fiddle

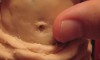
Now it is time to start building out the different components of the fiddle. I plan to give my fiddle a little flavor so do not expect it to look like a traditional fiddle. Instead, my goal is to tweak the design a bit using my own unique style. There is nothing wrong with a traditional looking fiddle and I’m not going to radically change anything but I wanted to create something that just didn’t look like something you see in our environment.

Read the rest of this entry »

Bulking the Fiddle

Posted by goregt On April - 21 - 2007

Filling out the base of the fiddle

So the goal of this lesson is to complete the frame for the body of my fiddle. I’m not going to be working on any of the details yet since I want to first build out a good base. Once my base is complete, I will again bake the sculpture and then start working on the details in the future lessons.

It is going to take several lessons to finish the fiddle so I’ll try to break them up to where they make sense.

Hopefully the third try is the charm for this lesson. Again, the polymer clay I am using for this particular piece is Super Sculpey.

Read the rest of this entry »

New fiddle

Posted by goregt On April - 21 - 2007

Sculpting a new fiddle

Well, it is that time again where we need to get back to sculpting the fiddle. I started working on the fiddle and it was coming along ok but I just felt that I was going to have to put a lot of time into it to get it the way I want it to look.

I’m very comfortable sculpting things from life, like the human body and animals, but inanimate objects always present themselves as a challenge. The key to sculpting things like a fiddle is to make sure that the shape is symmetrical on all sides. Instead of spending a lot of time trying to get just the basic shape down, I decided to take the pumpkin carving template approach to my design.

The first step was to search the internet for a picture of a fiddle that I could use as my template. Once I located a picture I saved it to my computer and resized the image to the size that i need for my sculpture

Read the rest of this entry »

The Artist Way

Posted by goregt On April - 17 - 2007

Finding your artistic roots. Always be true to yourself as an artist.

Out of all the lessons I will be putting together I believe this is the most important lesson of all. First of all your artwork should be an expression of yourself, your interest and your beliefs. Art should be more than just something that is pretty to look at, otherwise what is the point. I think a lot of us over time try to create art that we think will sell or please others. I myself have been guilty of this and in the long run I always felt a disconnect from my art that was solely created for commercial or monetary gains. Now, there is nothing wrong with profiting from your art but if your whole motivation for the creation of your art is the all mighty dollar then I think you have missed the point. The goal here is to get rich creating art you love, not art you hate or could care less about ;-).

Read the rest of this entry »

Torso Skin Details

Posted by goregt On April - 14 - 2007

Adding a skin texture chest and abdominal muscles

The final step in the torso detail stage is to add a skin texture to the sculpture. I love textures and I think the skin effect really does enhance the sculpture. I’ve already covered a tutorial on one way that you you can sculpt skin details in polymer clay but this lesson is going to use a different approach. Keep in mind that this type of detailing will probably not look good with all sculptures but should create a nice look for this particular piece. If I decide to paint this piece, I will probably create a bronze finish and the skin details should look good with the paint.

Time to finish up the front portion of the torso. Again, the polymer clay I am using for this particular piece is Super Sculpey.

Read the rest of this entry »

Torso Details

Posted by goregt On April - 14 - 2007

Detailing the chest and abdominal muscles

In the last lesson we bulked and defined the chest and abdominal muscles. Now it is time to start adding some detail to our sculpture. I am going to split this lesson into two separate tutorials. For the first lesson I will demonstrate how to create muscle cuts and striations in the clay and the second lesson will give examples on how I create a textured look for the skin on my sculptures.

It is important that you don’t jump to this stage too quickly. You should focus on building a good foundation using the information from the previous lessons before jumping into this tutorial. However, once the foundation is complete, I have to say that this is really one of my favorite steps in the sculpting process because it starts to change the way the art looks. Remember at the beginning of this tutorial when I said at first my art may look like a third grader created? Well this lesson moves us up a few grades in the experience level ;-).

Read the rest of this entry »

Evaluating Your Art

Posted by goregt On April - 13 - 2007

A few simple tips and tricks to help you evaluate your artwork

I’m a firm believer that when sculpting you should from time to time step back and take a different look at your art. If you stare at the same thing for too long of a period of time, it can become easy to overlook minor and sometimes major mistakes within your artwork. There are several different tools or methods that I use to evaluate my art when I am sculpting.

Read the rest of this entry »

Clay Torso

Posted by goregt On April - 5 - 2007

Filling out the torso

The goal in this lesson is to continue from the previous lesson by building out all the individual shapes that makeup the Fiddlers torso. In this lesson I plan to block out the chest and abdomen areas of the sculpture. The sculpture is still going to be pretty smooth at this stage of the game but this stage is very important for getting the shape of the individual muscles down correctly. All right, now onto the torso.

Again, the polymer clay I am using for this particular piece is Super Sculpey.

Read the rest of this entry »

Sculpting veins

Posted by goregt On April - 3 - 2007

How to sculpt veins in Polymer Clay

Sculpting veins is one of those things that is technically pretty easy to do but in reality takes some practice to get it down right. I think that the key to achieving well sculpted veins is to make them look like they are sitting right under the skin. I’ve seen a lot of sculptures where the veins appear as if they sit on top of the skin and it really takes away from the realism of the sculpture. Also, veins range in different sizes and shapes so you want to incorporate this into your design.

The tutorial below will walk you through the steps that I use to create veins for my sculptures. Remember that practice makes perfect so don’t give up if you do not get it right on the first try.

Read the rest of this entry »

Sculpting Torso

Posted by goregt On April - 2 - 2007

Blocking out the body

If you have been following this series from the beginning then I think it is pretty obvious that I like to jump around a lot when sculpting. The last lesson was on starting the fiddle and this one is jumping into blocking out the body. The reason why I jump around during the sculpting process is because it keeps everything fresh. I like to go with the flow and I really enjoy the process when I work this way. In the past I have experimented with my sculpting processes and have focused on completing one area before moving onto another but found that the final art really doesn’t work out they way I envisioned it.

All right, now onto the torso. Again, the polymer clay I am using for this particular piece is Super Sculpey.

Read the rest of this entry »

VIDEO

Enter the video embed code here. Remember to change the size to 320 x 270 in the embed code.

TAG CLOUD

Recommended Sites

About Me

Nothing special, just a self-taught sculptor having fun with my art and showing all of you the tips and tricks I use to create my own artwork

Twitter

    Photos

    Activate the Flickrss plugin to see the image thumbnails!