In this next tutorial I will walk you through the steps for sculpting a belly button. Belly buttons are actually made up of interesting shapes and there really is a lot more to sculpting them then just creating a hole inserted into the clay. Now belly buttons come in all types of shapes and designs but there are some traits that are common in most belly buttons. For instance there are small folds of skin in and around the belly button. Also, if you look closely the design and shape of the stomach also changes around belly buttons as well.
Because belly buttons come in all kinds of shapes and sizes there are many different types of belly buttons that you can sculpt. Keep in mind that this tutorial is just one example of how a belly button can look. So use this tutorial as one option for sculpting a belly button and see what designs you can come up with.A belly button can easily be sculpted using the following steps:
- First draw a line down the center of the belly
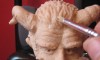
- Create a hole with a sharp or pointed sculpting tool
- Pull the tool down a bit to create an upside down teardrop shape into the clay (instead of a perfectly rounded hole)
- Add a small roll or snake of clay right above the hole (starting to add folds of skin now)
- Blend the edges of the clay into the belly
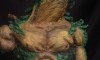
- Add small pieces of clay below and around the belly button to bulk out the belly a little bit
- Smooth out and keep adding the clay as needed
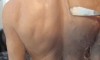
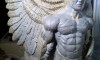
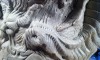
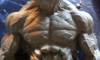
The picture tutorial below can be used to get a visual of the tutorial.


Next lesson – Sculpting the Belly
Previous lesson – Sculpting the Breast – 3
Back to Indigenous Allure home