OK, first off my apologies. It has been a little over two years since I’ve updated this project so I’m having to go through old pictures to piece it back together. This is still an unfinished sculpture so I will try to schedule time to work on it in-between my current projects. The good news is that it shows the durability of polymer clay. You can set it aside for a couple of years and in most cases pick up from where you left off.
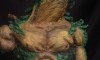
As I commented in a previous post, I initially started out planning only to create a bust for this figure. I ended up changing my mind along the way and decided to do a full figure instead. In order to make this work a makeshift armature was needed to build out the lower half of the sculpture.
Ideally the best case scenario is to build out the armature for the entire figure from the beginning but we do not live in a world of best case scenarios. My designs are usually dynamic in that they change throughout the sculpting process. This tutorial is a good example on how I like to try and figure out how to “make something work” even after the original plans have changed.
The picture tutorial is documented below. Just a few highlights to explain the pictures.
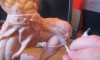
- My figure will have a skirt over the the lower body so I’m only concerned with sculpting a basic design for the legs for the skirt to rest on.
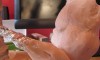
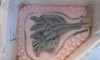
- The third picture in the tutorial is a rough mock-up of the skirt with scraps of clay. Sometimes I like to get a rough idea of a design before spending countless hours into the sculpting phase. I liked the concept so I moved forward with creating thin sheets of clay for the skirt using my pasta machine.
- The thin polymer clay sheets are placed on top of each other creating an illusion that the skirt is wrapped around the legs in different layers.
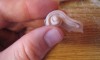
- My leg armature will not support this sculpture so I secured my piece with a homemade sculpting stand. Basically it consist of a threaded rod that is inserted into the back of the sculpture (I’ll have to put together a tutorial on how to make the stand)
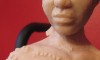
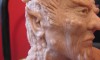
- In the last image I’ve already included a pick of some of the scars on my figure. I will show the process on how I created the scars in a future tutorial.


Next lesson – Skirt details
Previous lesson Sculpting the tribal arm
Back to Indigenous Allure home