Filling out the base of the fiddle
So the goal of this lesson is to complete the frame for the body of my fiddle. I’m not going to be working on any of the details yet since I want to first build out a good base. Once my base is complete, I will again bake the sculpture and then start working on the details in the future lessons.
It is going to take several lessons to finish the fiddle so I’ll try to break them up to where they make sense.
Hopefully the third try is the charm for this lesson. Again, the polymer clay I am using for this particular piece is Super Sculpey.
 |
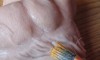
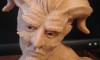
The two fiddle halves have been baked and now it is time to add a thin layer of Vaseline to the clay. I apply the Vaseline to the sides of the clay that will be facing towards the center of the sculpture. The Vaseline helps the new clay stick to the baked clay.Wipe off the excess clay with a napkin (doesn’t take much Vaseline to get the job done) |
 |
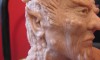
Next I add a thin layer of clay to the base of the fiddle. I usually add a very thin layer at first to give the new clay something to stick to. |
 |
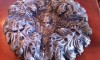
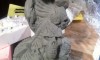
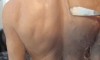
A picture of my two fiddle halves with a thin layer of clay applied to them. |
 |
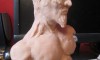
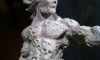
Now I bulk out the clay to my desired thickness. |
 |
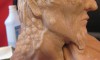
I add the two baked pieces to the new center piece. I then smooth out the edges, with 91% rubbing Alcohol, and then bake again at 275 degrees for 15 minutes. |
Next lesson – Fiddle Components
Previous lesson New fiddle


Todos los tutoriales son verdaderamente buenos. Yo soy escultora desde hace más de 20 años, pero hasta hace muy poco tiempo no conocía la arcilla de Polímero, por ello todo esto es de gran ayuda para mi. Doy las gracias a todos los que con sus consejos nos hacen más fácil el aprendizaje en la materia.
Gracias y saludos.