Changing the design of the horns
 The original horns on this sculpture have been bugging me for some reason. Although I was not finished with sculpting them, I just didn’t love the way I had designed them. I have been wanting to change the horns around a bit but was not exactly sure what I wanted to do.
So after setting aside the original design for a few weeks I decided to tackle the horns one more time. I like to make things up on the spot when I sculpt so the first step for me was to smooth out the original design and just start adding clay to the piece.
* This sculpture is created with Super Sculpey.
 |
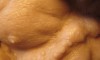
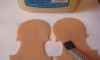
Okay, the first step is to build out the foundation (starting to see a pattern here from the previous lessons).I build out the rough shape that I want to use on my horns. For me it is best to sculpt both horns at the same time. In the past I have sculpted things like this separately and ended up having issues trying to make them look symmetrical. |
 |
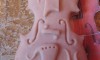
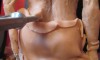
I draw some line into the clay to start the design that I will use for my horns. |
 |
Continuing the pattern to the entire horn. |
 |
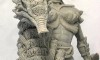
The basic detail has now been added to both horns. |
 |
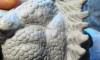
Running with my imagination a bit I start to add little bumps and warts to my horns. A lot of times changes like these just come to me while I am sculpting. I usually will experiment a little and if I like the changes I will keep them and if I don’t, I can quickly undo them. |
 |
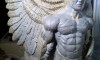
And a look at both of the horns with the bumps applied to them. |
 |
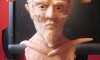
A black and white picture of the horns so that we can better see the details. The horns still are not complete since I need to add details to the ends of the horns. I’m closer to completion now on the horns and I am a lot happier now with the look that the new horns create for this piece. |
Next lesson – Spicing up the neck
Previous lesson Adding veins to the arm