Spicing up the neck
I’m a very dynamic sculptor (I’ve said this before and I am sure I’ll say it again). With my own original art I usually have a basic idea of the sculpture I want to create but once I get started I just kind of make things up as I move along. Personally I view this as a strength and not a weakness because the final design usually ends up better than the original vision.
That being said the new design to the horns has given me an idea on how I can spice up the rest of the sculpture a bit. I’ll start with changes to the neck in this tutorial and will move on from there in the later lessons.
* This sculpture is created with Super Sculpey.
 |
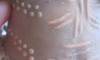
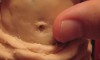
This is actually a pretty easy tutorial that creates a dramatic difference in the look of this piece. The first step is to take little balls of clay, at various sizes, and press them into the neck.* Ignore the ear for now (I know it looks terrible). I will cover sculpting the ear in the next lesson. |
 |
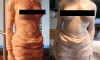
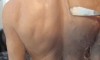
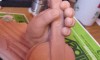
Using one of my sculpting tools a press the edges of the balls of clay into the neck. |
 |
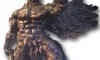
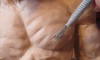
Smooth everything out with a little alcohol and there you have it. Note: I will go back later and add the skin details to the bumps. |
Next lesson – Sculpting the ears
Previous lesson Changing the design of the horns