From my experience there is a vast difference in the amount of effort that is required to smooth out wax sculptures versus sculptures sculpted with any of the polymer clays. The underlying principles and concepts are the same but wax, when cooled, is a much harder medium and thus requires quite a bit more work to achieve the desired result. Keep in mind that this is under the assumption that you smooth out your polymer clay sculptures prior to baking, which I have always done in the past. Some sculptors will bake their polymer clay sculptures and use wet sanding techniques for the final smoothing stages (this process will exponentially increases the amount of work needed to smooth out the sculpture).
Search Results
Sculpting with Wax vs Polymer Clay
On July - 31 - 2008
Stop the press, isn’t this site suppose to be about polymer clay sculpting, after all the name of the site is Polymer Clay Fan! Yes you have read the title to this post correctly, I’ve started playing with wax lately and although I’m still wet behind the ears I thought why not put together a little post to compare the two mediums. I’m sure a few diehard polymer clay artists may snub their nose at this post but I recommend reading through the entire article before jumping to a conclusion. This isn’t an article about discrediting wax or even polymer clay, it is just my observation of the positives and negatives the two different mediums have to offer.
Sculpting Scales
On September - 17 - 2012
There are a lot of different ways you can sculpt scales and the tutorial below is just one of many examples that you can use. I’m using a wax in this tutorial but the same steps can be used with polymer clay.
- The first step is to design and sculpt the forms of your sculpture (i.e. muscles bulging, wrinkles in skin, etc)
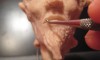
- Next, using a sharp tool I will draw patterns into my wax.
- Periodically I’ll brush away the excess wax to clean my surface while I work.
- Once I have my pattern to my liking I’ll go back and carve a deeper cutout around my shapes.
- After the excess wax has been removed I’ll begin to smooth out and clean up the sculpture with Odorless Mineral Spirits (use rubbing alcohol if you are sculpting with polymer clay). Read the rest of this entry »
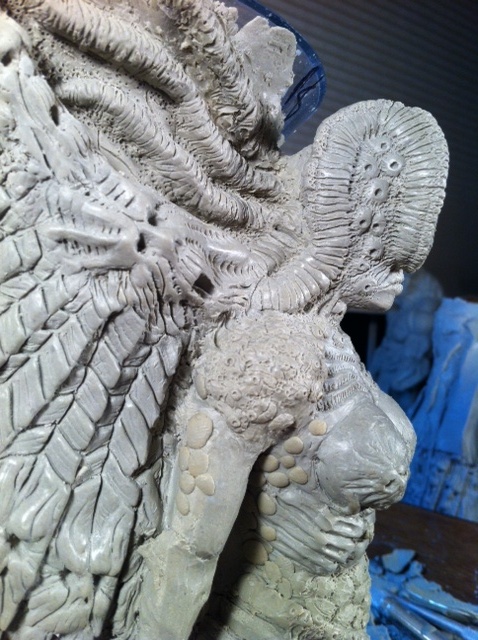
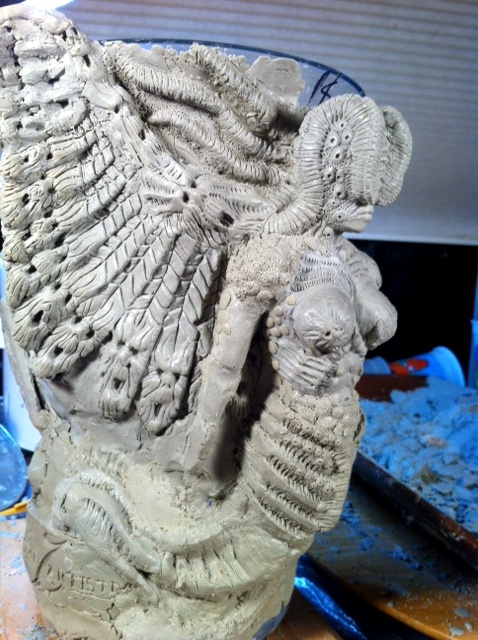
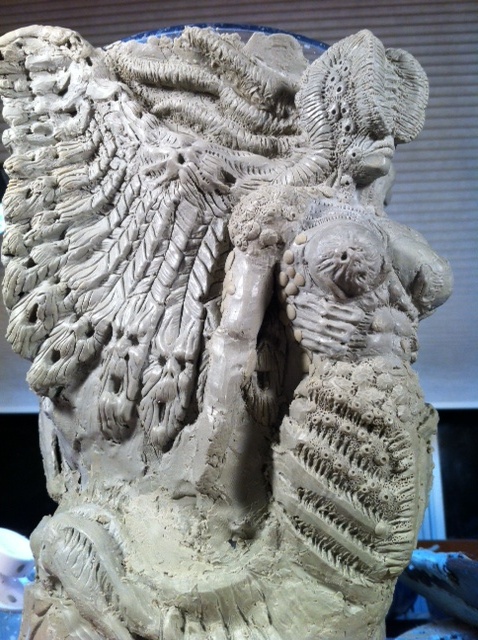
Angel & Demons – More Details on the Demon
On February - 8 - 2012
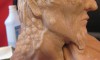
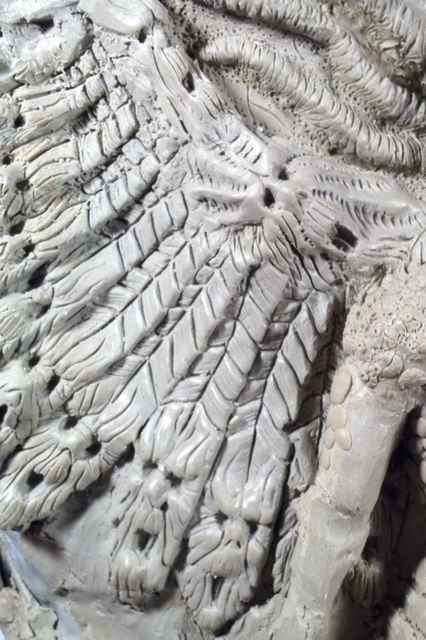
In the attached pics I’ve done a little cleanup work on the wings and the demon’s face. I still have a very long ways to go with this piece but everything is starting to take shape now. The cleanup is pretty easy, it just takes a bit of time and patience to work through it.
- Instead of using a brush with rubbing alcohol, which is used to smooth out Super Sculpey, is use Orderless Mineral Spirits when working with wax.
- The key is to let the Mineral Spirits dry before moving onto the next stage. The wax will dull a bit and also tends to get a little tacky.
- Once dry I come back with my brush and warm water. The water will bead up on the wax and I can use quite a bit of pressure to clean the forms.
- If necessary I’ll also use a very smooth cloth that is soaked in warm water. The cloth is more ideal for larger areas and you can really adjust the pressure when smoothing out the forms.
These are the steps I typically take when smoothing out the various forms but there are times when a very fine grained sandpaper is necessary. Most of my work is textured and I usually use the sandpaper on areas that need to be very smooth. The following link goes into more detail on the steps I just covered – smoothing wax.
Angel & Demons Cigar Ashtray Tutorial
On January - 31 - 2012
My goal for this tutorial is to show step-by-step how the GoreArtistry cigar ashtrays are created from concept to the final product. The tutorial will be covering the following topics.
- Basic picture tutorial for the sculpting of the ashtray
- Creating the mold
- Pouring a cold-cast bronze
- Sanding and polishing the cold-cast bronze
- Final product
The first step in any project is coming up with a design. Great sculpting on top of a poor design will in most cases result in a mediocre product. However, I’ve seen projects that have great designs with average sculpting skills create something that really is interesting to look at. My goal is to hopefully strive for the best of both worlds with a product that results from above average sculpting skills and a great design (we shall see if I’m able to pull it off). Read the rest of this entry »
Minotaur Base
On August - 24 - 2011
I still have some work to do on my Minotaur’s head, body, etc but I wanted to go ahead an attach him to a base to get an overall idea on how the sculpture is going to look. Adding the base is a pretty easy task with wax since there really is no need for a support system (armature) for it to be able to hold up the sculpture. Also, another huge advantage for using wax is that I was able to create wax cast from some of my other skull sculptures. This allowed me to add a few of my already previously sculpted skulls to the base verse having to spend a lot of time sculpting each individual piece. I have so many projects going on right now shortcuts like the wax cast really help me move the piece along. I’m also able to sculpt the pieces together in a way in which they look unique, so the sculpture is not “cheapened” by this process. Read the rest of this entry »
Cigar Ashtray Sculpting Trick
On August - 11 - 2011

For the most part I live a very healthy lifestyle, I’m in the gym six to seven days a week, eat very clean (except for Saturdays) and rarely drink. I’m not oblivious to the fact that most people will probably find me to be a pretty boring person but hey I am what I am. However, that being said one of the vices in my life is that I like to smoke cigars. I don’t get to smoke them often, at best only a couple times a week, but they are something I’ve come to really enjoy over the years.
I enjoy collecting different cigar accessories, for example lighters and cutters, however one of the key accessories that was missing from my collection was a cigar ashtray. There are quite a few cigar ashtrays out there that have a good design but I have yet to find one that really grabs my attention. One of the key advantages of being an artist is that if I’m unable to find what I’m looking for in the commercial market I can always create it myself. I wanted an ashtray consisting of skulls and skulls so it was off to the workshop to begin my project. Read the rest of this entry »
Fresh Eyes
On March - 8 - 2011
It should be no surprise to anyone that has dabbled in clay and wax that sculpting is a very time consuming project. There may be some artist out there that can whip out masterpieces in a flash but for us mere mortals most projects require a vast amount of hours from their inception to their completion. As with any activity that demands a huge investment of your time, it’s easy to get lost in the mistakes. I am also guilty of spending countless hours working on a section of my art only to find out later that the symmetry is off or that the design is just too stale.
Sometimes the best approach for tackling a big project is to know when you need to set aside some distance with it. I’ve found that if I spend too much time on one area of my sculpture that I sometimes get lost in it and my eyes can no longer see the mistakes. Due to my schedule, most of my sculpting can take me into the late midnight hours so I’m already at a disadvantage with tired eyes before I even begin. For this reason I’ve found, although fail to put into practice form time to time, that it is best to jump around the sculpture instead of becoming fixated with one section of it. However, no matter how much jumping around I do there are times that I need to set the sculpture aside and revisit it with what I call “fresh eyes”.
Read the rest of this entry »
Pumpkin Sculpting
On October - 8 - 2009
Hey Gang, with Halloween fast approaching did you know that there is a really cool and great way to really impress your friends and family with your talent?. Although this website centers more around sculpting with polymer clay and wax, there are a lot of other types of materials that you can easily sculpt. Metal and wood seem obvious answers here but how about pumpkins. Can you think of any better way to spice up your Halloween this year than sculpting a really cool looking pumpkin?
Now I don’t want to be misleading here, sculpting pumpkins in very different than sculpting in wax or polymer clay. It’s kind of like sculpting with wood, the process is 100 percent a subtractive. You have to carve away the flesh of the pumpkin and any mistakes made could force you to reshape or even change your design. I know it sounds challenging but with a little practice it really is not that bad and most important of all it is a ton of fun! Read the rest of this entry »
Mark Alfrey Video on DVD
On September - 10 - 2009

Mark Alfrey
One of my favorite sculpting videos of all time is Mark Alfrey’s Sculpting the Human Head. For those of you who are unfamiliar with Mark Alfrey, he is both a sculptor and special makeup effects artist for the television and movie industries. Mark’s resume includes popular movies and TV shows like Men in Black I and II, 300, X Files, Ghostbusters II and much more.
Mark is not only an extremely talented sculptor but is also a great teacher as well. I have two of Mark’s videos and both videos are consistent in their teaching methods. Mark uses time-lapsed photography in his tutorials and narrates as you watch a lump of clay transform into a sculpture before your eyes.
In the Sculpting the Human Head video you learn how to create the different shapes in the face, how to create wrinkles, skin textures and much more. He really covers in detail on how you approach the different features in the face such as the shape of the eyes, the skin folds around the nose and the placement of the ears. Read the rest of this entry »