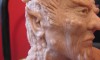
Attaching the arm
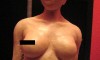
All right, so we have rebuilt the arm and now it is finally time to reattach it back to the sculpture. I went ahead and baked the existing arm so that I did not mess up any of the details. In hindsight this method could be improved if you planned to use the polymer clay sculpture as a final piece.
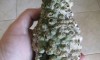
Even though the arm did attach relatively well there are a few weak points which I will point out in a minute. If I had to do it all over again I would want to do a better job of anchoring the arm into the shoulder instead of relying on a thin piece of clay as the support (probably would use wire, some form of bondo or superglue – however make sure whatever you use is not toxic if you have to heat it up in an oven or with a heat gun).
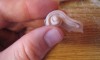
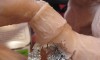
- Apply a thin layer of Vaseline to the base of the arm and the shoulder where the arm is missing.
- Add a layer of fresh clay to the arm
- Attach the arm and blend the clay from the shoulder to the upper arm
- Bake the sculpture (or heat the area with a heat gun)
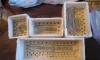
* I baked my entire sculpture in this example and the last two pictures with the black marks indicate areas where the sculpture cracked during the baking process. An easy fix but it does indicate armature issues since the cracks are caused by stress on the sculpture.
 |
 |
|
 |
 |
|
Next lesson – Sculpting bumps on the shoulder
Previous lesson – Spicing up the chest